☰
Only Good Antibodies · onlygoodantibodies.co.uk
A practical framework for deciding how much validation you need, selecting appropriate controls, and documenting your reasoning — built on consensus principles from 32 international experts.
Antibodies are among the most widely used tools in biomedical research, but they do not always bind exclusively to their intended targets. Using an antibody that doesn't work as assumed can misdirect entire research programmes, waste funding, and consume irreplaceable biological samples.
This framework helps you plan proportionate validation — so that the most rigorous scrutiny is directed at the antibodies where the risk is highest. It applies whether you are planning experiments, supervising trainees, reviewing manuscripts, or evaluating grant applications.
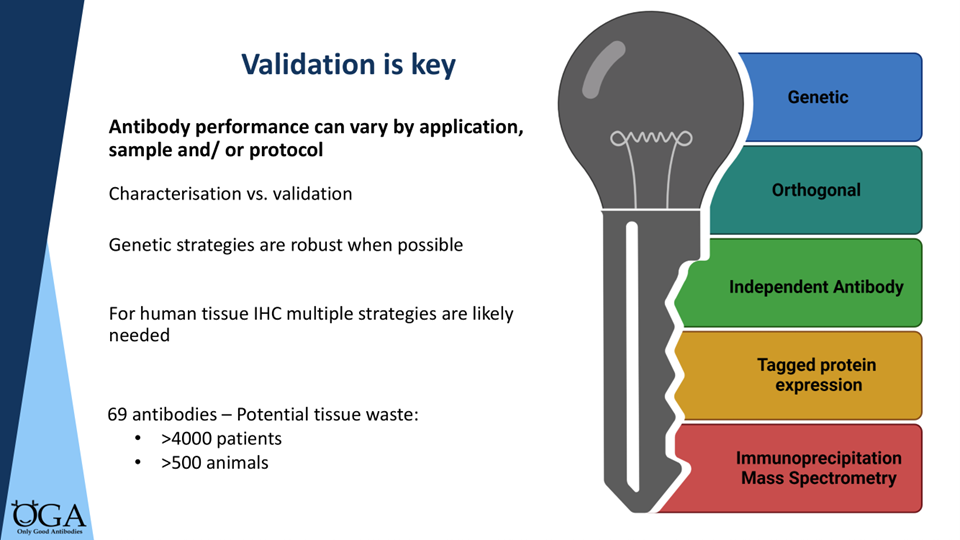
The level of validation evidence you need depends on how central the antibody's specificity is to your scientific conclusion. We distinguish three situations:
Your question is about a particular protein — its role, expression, or location. If the antibody detects something else, your conclusion is wrong.
The antibody identifies a cell population or phenotype — it defines context, not the subject of your experiment.
The antibody serves a process role (e.g. loading control) where specificity for the stated target isn't what matters.
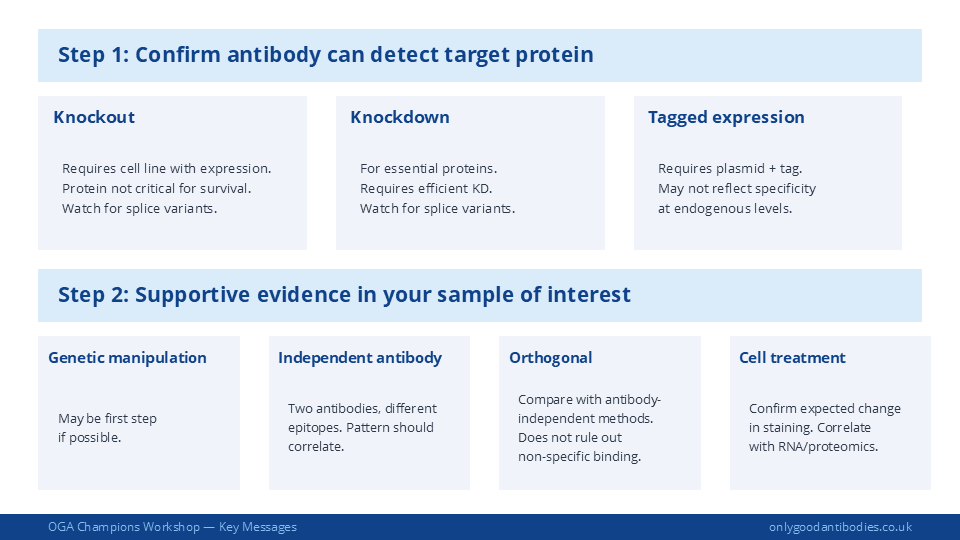
When your research question is about whether a particular protein plays a role in a process or disease, you need high confidence that your antibody data relates directly to that protein. Aim for the strongest validation evidence available — ideally genetic controls (knockout or knockdown) in the application and sample type you are using.
If community-adopted tools exist for your purpose — for example, HCDM workshop-verified clones for CD markers, or OMAP-validated panels for spatial biology — it may be sufficient to adopt these tools, provided you confirm you are using the same clone as characterised by the consortium.
Groupthink risk. For well-established populations with decades of cross-validation, the risk is lower. For less well-studied or rare cell populations, the evidence base behind the markers may be thinner than assumed. Where phenotypic analysis is critical to your hypothesis, consider applying the same standard as for target-specific questions.
For loading controls, total protein staining methods (Ponceau S, Stain-Free gels) are increasingly recognised as more reliable than antibody-based housekeeping controls, which can vary with experimental conditions. If you are using an antibody purely as a process control, document what it is actually for.
Try the interactive version. The Validation Planner walks you through these categories for each antibody in your experiment and generates a structured plan.
Options ranging from strongest to most accessible:
Confirm expression first. Use ProCan-DepMapSanger (mass spec data, 949 cell lines) or DepMap RNA expression data to confirm your cell line expresses the target. A commonly used threshold of TPM ≥ 2.5 is not definitive — mass spec confirmation is stronger where available.
For immunohistochemistry on human tissue: consider staining FFPE cell pellets from knockout cell lines alongside your tissue sections, using the same protocol.
For quantitative work: you may need controls spanning a range of expression levels — tissues or cell lines with graded expression, or for ELISA-type assays, spiking recombinant protein into plasma at known concentrations.
Use the controls you have selected in the exact assay system you are using. If you are validating for immunofluorescence, run your positive and negative controls through your immunofluorescence protocol. The protein is presented differently depending on the application — denatured vs. native, fixed vs. unfixed, intracellular vs. surface.
Protocol details matter. For flow cytometry, fixation and permeabilisation method can fundamentally change antibody performance. An antibody that works for surface staining may fail after fixation. For intracellular targets, consider testing multiple fixation/permeabilisation protocols (PFA-saponin, PFA-Triton, methanol).
If you cannot demonstrate a clear difference between your positive and negative controls in the assay you intend to use — do not use that antibody in that assay.
Where possible, build in complementary readouts to confirm the same story. If your antibody shows increased protein expression, does RT-qPCR show increased mRNA? If flow cytometry shows a shift, does single-cell RNA sequencing support the same conclusion? These orthogonal approaches strengthen any antibody-based finding.
Record your results. Once you've run your validation experiments, use the Validation Recorder to document the outcome and generate a shareable validation record.
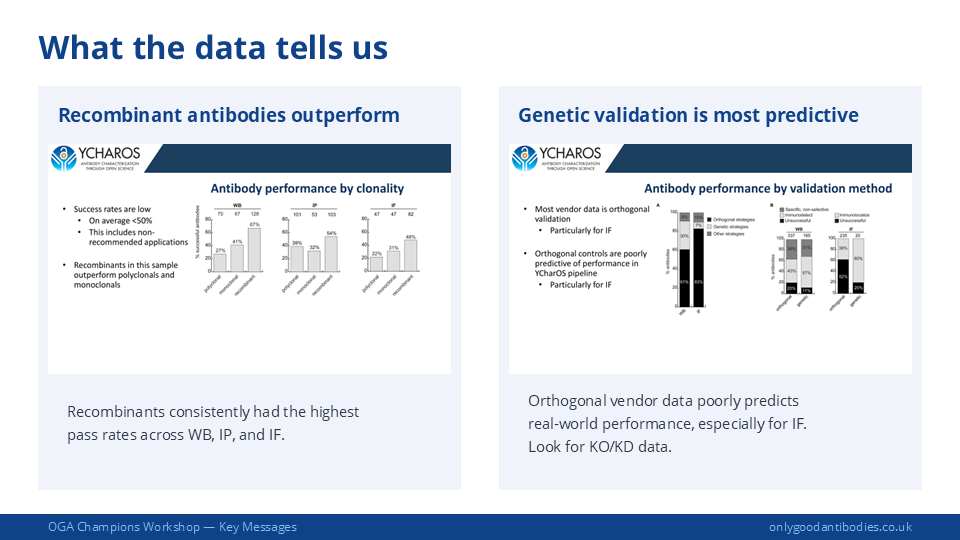
Look at the actual images rather than relying on tick-boxes or claims. Check whether the data is from the same application and sample type as your planned experiment. Manufacturer data with genetic controls is replicable more than 80% of the time — but always verify the specifics.
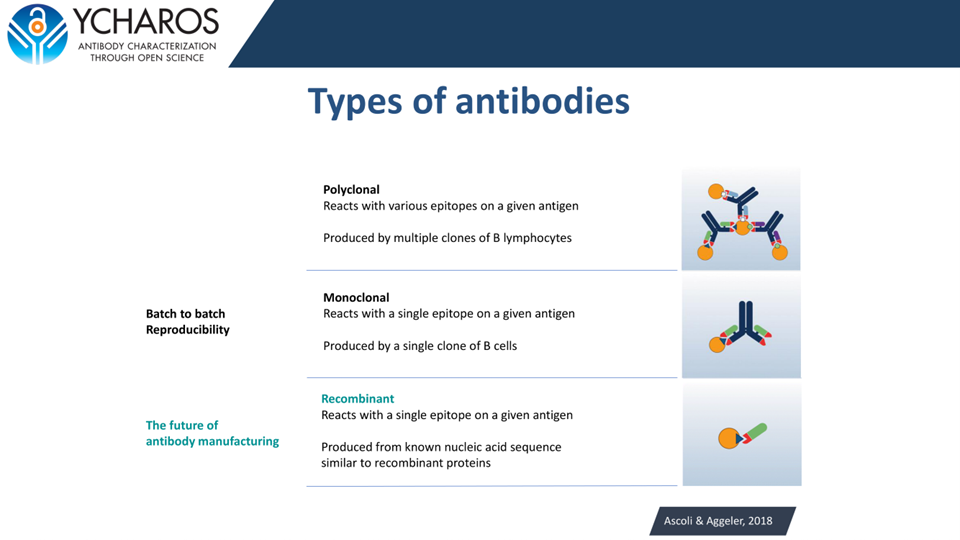
Large-scale independent testing shows recombinant antibodies have the highest success rates across applications: approximately 67% for Western blot and 48% for immunofluorescence, compared with monoclonals (41% WB, 31% IF) and polyclonals (27% WB, 22% IF).
For each antibody-dependent experiment, record:
Interactive tools for each stage:
📋 Validation Planner — walks you through items 1–6 and generates a structured plan document.
📝 Validation Recorder — documents item 7: the outcome of your validation experiments with images and data.
This framework implements principles endorsed by a multi-stakeholder Delphi consensus study (Blades, Biddle, Froud et al., 2026) in which 32 international experts rated proposed interventions for improving antibody validation practices. The panel reached consensus that researchers should be trained in antibody validation, that institutions should embed validation expectations into research integrity frameworks, and that funders should require validation plans in grant applications.
We welcome feedback on this framework. If you have suggestions, concerns, or would like to be involved in developing implementation guidance, please contact us or email Dr Harvinder Virk at [email protected].
The Validation Planner walks you through this framework interactively — list your antibodies, categorise them, and build proportionate plans for each one.